To rescue your classic tools requires patience, sturdy abrasives—and vision.
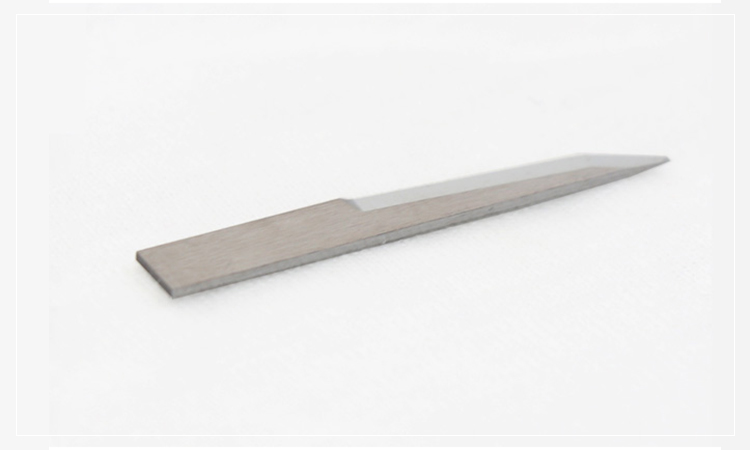
Gear-obsessed editors choose every product we review. We may earn commission if you buy from a link. Why Trust Us? Carton Round Knives
If you love tools, you’ve probably experienced the odd, magnetic power that old, rusted tools possess. They capture your attention and pull you in. The next thing you know, you're scraping away rust with your thumbnail, trying to make out the manufacturer’s name.
As foggy memories flood back, you try to recall how exactly you came to own this neglected tool. Perhaps you got it at a tag sale or maybe your father passed it down to you. Or, had you borrowed it from a neighbor and forgot to return it? “Everybody has them, these little hidden jewels,” says contributing editor Richard Romanski, a fine woodworker and unrepentant tool collector. “Restoring them is pretty easy.”
We gathered a bunch of forlorn rusted tools and went to work in his studio, a cavernous former church in North Salem, New York. And we discovered that all it takes is some basic chemistry, a little patience, and some elbow grease to restore old, rusted tools to like-new condition. Here’s a detailed account of how we removed years of rust from a table saw, some corroded hand tools, and a few dull precision-cutting tools.
A table saw that’s kept in an unheated garage, shop, or barn will soon rust. Moisture condenses on its steel and cast-iron parts because they’re cooler than the surrounding air. Then it’s only a matter of time before you start to see rusting and pitting.
The rust isn’t only unsightly, it also makes it difficult to slide wood across the table, which should be perfectly smooth. And rust can affect adjustable mechanisms, too, making it hard to raise and lower the blade or tilt the blade for executing bevel cuts. We found the circa-1980 Craftsman table saw shown above at a church auction. Its table was badly rusty and its parts had been thrown out of alignment. But it only cost $80 and we knew we could restore it to good working order.
We knew we had to move the saw to a warm, dry location, so we unbolted it from its rolling stand, hoisted it into a Ford F-150, and drove it down the street to Romanski’s studio workshop. Next came the tedious disassembly process: We unbolted the cast-iron wings from each side of the saw table and then removed the motor. Tip: Take photos of the saw and label each part prior to disassembly. That’ll make it easier to reassemble everything later.
We were pleasantly surprised to discover that the saw had a commercial-duty motor with twin capacitors—one to start the motor turning and another to provide extra kick to the run winding. The motor’s shaft and pulley were all in good shape, but everything was caked in dust and cobwebs. We used compressed air to quickly clear out of the saw’s cavity and undercarriage.
Now it was time to remove rust from the saw's table and extension wings. We started by wetting the surfaces with kerosene, which acted as a cutting lubricant. After letting kerosene penetrate for about an hour, we buff away the rust using a variable-speed drill outfitted with a 2½-inch-diameter nylon cup brush that’s embedded with 240-grit aluminum oxide abrasive. We ran the drill slowly at around 500 rpm, and move it back and forth across the surface for several minutes. The cup brush removed the rust without marring the surface. We then mounted the wings back onto the saw and aligned them flush with the saw table by carefully tapping them with a dead-blow mallet.
After placing a new 10-inch carbide-tipped saw blade on the arbor, Romanski used a machinist’s square to ensure the blade was perfectly perpendicular to the table. With the blade at 90 degrees, the pointer indicator on the saw's tilt scale should read 0 degrees; if it doesn’t, move the pointer to the zero mark. Next, we adjusted the sliding fence and its locking mechanism to ensure it locked securely and was perfectly parallel with the blade.
The tune-up was completed when Romanski reinstalled the motor and used a long steel ruler to align the motor pulley with the pulley on the saw's arbor shaft. That’s an important step because if the pulleys aren’t aligned, excessive vibration will prematurely wear out belts and bearings. We then buffed paste wax onto the restored metal surfaces to help deter future rusting, bolted the saw back onto its stand, and made several test cuts. The saw ran smoothly, cut effortlessly, and looked great!
Rusty hand tools seem to turn up everywhere: in sheds, basements and garages; in old, forgotten toolboxes; in car trunks; and, of course, at tag sales all across the country. Often the original wooden handles are cracked, rotted, or missing altogether. And the steel heads are so badly rusted you could get tetanus by just looking at them.
To restore a pile of ball-peen-hammer and a couple of hatchets, we first had to remove what was left of their handles. We used a handsaw to cut the handle stubs flush with the tool heads, then we clamped each head in a vise and used a hammer and punch to knock out the last bit of the handle.
To dissolve years of corrosion, we submerged the heads in a bucket containing a gallon of white vinegar. We covered the bucket with a piece of plywood and let the parts soak for about four hours. Next, we scrubbed off the surface rust with Grade 1 steel wool. It didn’t remove all the rust, but there was a noticeable difference. Back into the vinegar the tool heads went, and this time we let them soak overnight. Next, we buffed them again with steel wool, and all the rust came off. We rinsed the tools thoroughly in clear water to remove any last trace of vinegar and wiped them dry.
Some of the tool heads were severely pitted, so we smoothed them with a disc sander fitted with a 100-grit abrasive disc sander. On a couple of the ball-peen hammers, the metal around the head’s striking surface had been peened over by repeated hammer blows. To repair the damage, we clamped each hammer head in a vise and then hand-file the surface smooth.
Finally, the tools were wiped clean with mineral spirits, primed with a rust-preventive metal primer (we used spray-on Rust-Oleum), and painted with gloss alkyd enamel. The cutting edges on the hatchets were hand-honed on a series of water stones used for woodworking tools. We completed each tool by fitting a hickory handle through the cavity in the head.
The first step in restoring precision tools is to carefully disassemble the tool, separating the corroded parts from the clean ones. In the case of the smoothing plane shown here, the body wasn’t as badly corroded as it first looked. We removed most of the rust with a wire brush. Then we lapped the sole of the plane on a succession of abrasive papers, beginning with very coarse 60-grit and proceeding through to super-fine 1,000-grit.
We taped the sandpaper to a workbench that had a perfectly flat surface and slid the plane body over the paper, swapping it end for end after every six or eight passes. We used a few drops of odorless mineral spirits as our cutting lubricant. The body came out flat and smooth, with no rust and only very minor pitting.
Next, we sharpened the plane iron on a horizontal wet sharpening wheel and even honed its back surface so that it was flat several inches behind the cutting edge. This ensures that the chip breaker will snug up tightly against the iron, so no wood shavings can be trapped and torn off.
After sharpening, we took the lever cap and the plane iron’s chip breaker and buffed them out on a muslin buffing wheel with jewelers red rouge polishing compound.
Romanski has more than forty years of woodworking experience, so he did the final inspection of the plane iron. He followed the machine honing with a careful trip over his water stones, leaving the plane iron with a mirror finish. He assembled and adjusted the rescued plane and took it for a test flight across a piece of clear pine. The result was a tool that cut perfectly, taking long, silky-smooth shavings with every pass.
Roy Berendsohn has worked for more than 25 years at Popular Mechanics, where he has written on carpentry, masonry, painting, plumbing, electrical, woodworking, blacksmithing, welding, lawn care, chainsaw use, and outdoor power equipment. When he’s not working on his own house, he volunteers with Sovereign Grace Church doing home repair for families in rural, suburban and urban locations throughout central and southern New Jersey.
Joe is a former carpenter and cabinetmaker who writes extensively about remodeling, woodworking, and tool techniques. He has written eight books and is a contributing editor to Popular Mechanics. He also appears on the Today’s Homeowner TV show, and co-hosts the weekly Today’s Homeowner Radio Show. Joe writes from his home in Roxbury, Connecticut.
The Best Garage Heaters for Indoor-Outdoor Warmth
This Electric Snow Shovel Is 32% Off at Amazon
The DeWalt Mechanics Tool Set is 36% Off at Amazon
This Jackery Solar Generator Is 37% Off at Amazon
The Best Fireplace Tools Sets
The Best Hacksaws for Smooth and Fast Cuts
Heat Yourself, Not Your Surroundings
The Best Tool Gifts for DIY Lovers
A Part of Hearst Digital Media
We may earn commission from links on this page, but we only recommend products we back.
Wood Chipper Knives ©2024 Hearst Magazine Media, Inc. All Rights Reserved.